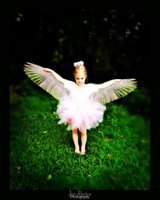
A few photographer friends of mine were asking for help in putting wings on a subject. So, here is a quick tutorial using Photoshop. This is very basic and simple. I do not go into details, just giving you a basic step by step to get your started in your fairy making adventure. I hope you find this helpful.
1. Do your basic workflow on your picture. Levels, curves what have you.

2. Make a new layer. (Not a duplicate layer) Name it wings or wing 1 if your wings are not attached.
3. Choose your brush tool and select your wing brush that you want to use.
4. Adjust the size of the brush and click into place.
5. Chances are the wings do not line up right. So, on your keyboard hold down the ctrl key and the T key. This brings up the free transform tool. Turn, move, manipulate the wings until they look in the right position and proportion.
6. Double click to lock it into position.
7. Take your eraser tool and erase on your subject where the body should be in front of the wings.
8. Adjust opacity if you wish and Flatten layers.

9. Make a new layer and add any extra brushes you would like, such as fairy dust or stars. Adjust opacity and flatten.
10. Make another layer and play with different light effects.
11. Use any filters or actions you would like. Be creative, be daring, be adventurous!
